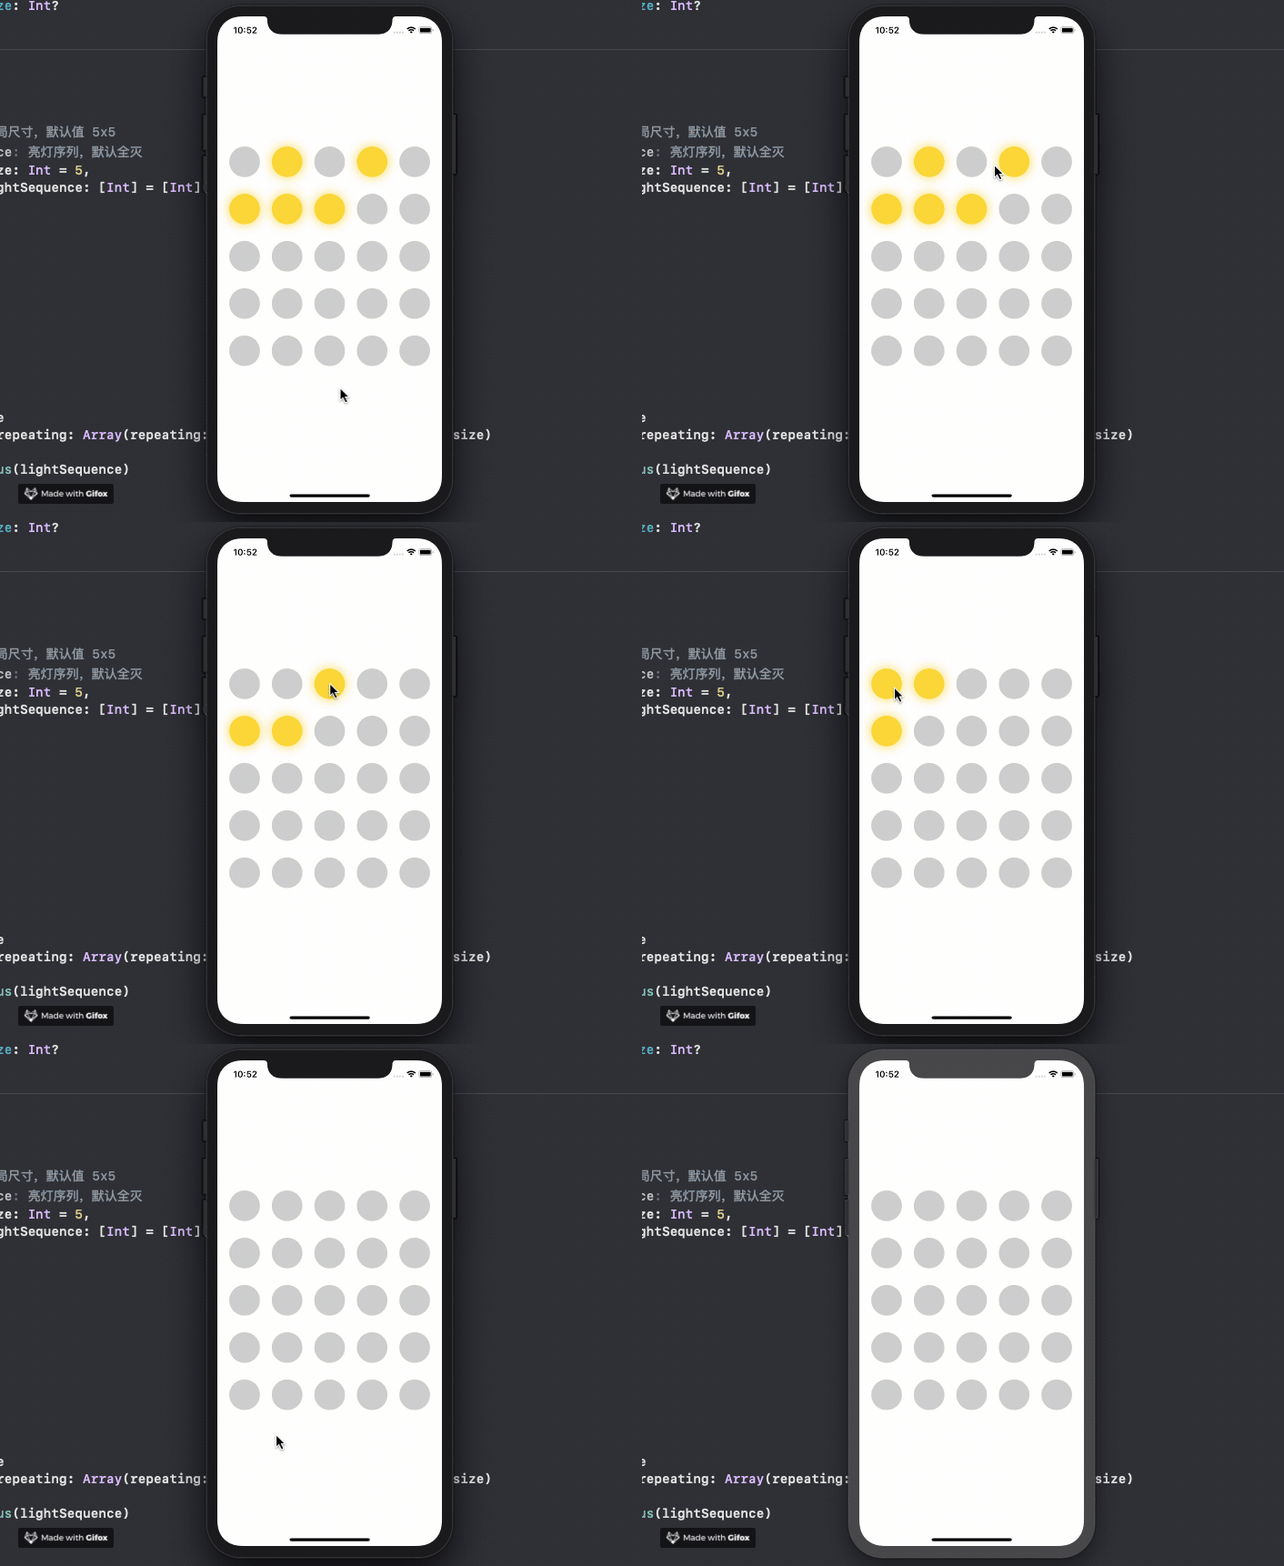
前言
在上一篇文章中,我们已经完成了对《能否关个灯》小游戏的界面和游戏逻辑进行了初步搭建,并且也具备了一定的可玩性。但细心的你会发现,这种「随机过程」的游戏开局,我们几乎一把都不会赢,因为这并不符合这个游戏的初衷——逆序出开灯的顺序去关灯。
关卡配置
在现有代码中,每次新开局游戏里各种灯的状态都是之前我们通过「随机化」Light 模型中的 status 状态做到的,这种做法之前也说过了几乎不可能把所有灯都关掉,因此我们需要对数据源做一些处理,使之能够通过「配置」去生成游戏开局。
至此,我们的 ContentView 已经比较庞大了,而且作为一个 View 它所承载的内容已经到了需要被抽离的时间点,我们不能再往 ContentView 里塞关卡配置的逻辑了。
因此,还是那句话「计算机科学领域的任何问题都可以通过增加一个间接的中间层来解决」,所以我们将引入一个 GameManager 来处理关卡配置。GameManager 中负责的主要内容有:
- 配置关卡的 size(3x3 or 4x4…
- 配置关卡的随机过程;
- 维护灯状态;
- 配置关卡的一些 UI 。
新建一个 GameManager 类,并把之前写在 ContentView 中的逻辑都迁移进去。经过一番调整后,我们的代码就变成了:
1
2
3
4
5
6
7
8
9
10
11
12
13
14
15
16
17
18
19
20
21
22
23
24
25
26
27
28
29
30
31
32
33
34
35
36
37
38
39
| import SwiftUI
import Combine
class GameManager {
var lights = [
[Light(), Light(status: true), Light()],
[Light(), Light(), Light()],
[Light(), Light(), Light()],
]
func updateLightStatus(column: Int, row: Int) {
lights[row][column].status.toggle()
let top = row - 1
if !(top < 0) {
lights[top][column].status.toggle()
}
let bottom = row + 1
if !(bottom > lights.count - 1) {
lights[bottom][column].status.toggle()
}
let left = column - 1
if !(left < 0) {
lights[row][left].status.toggle()
}
let right = column + 1
if !(right > lights.count - 1) {
lights[row][right].status.toggle()
}
}
}
|
ContentView 中的代码被修改为了:
1
2
3
4
5
6
7
8
9
10
11
12
13
14
15
16
17
18
19
20
21
22
23
24
| import SwiftUI
struct ContentView: View {
var gameManager = GameManager()
var body: some View {
ForEach(0..<gameManager.lights.count) { row in
HStack(spacing: 20) {
ForEach(0..<self.gameManager.lights[row].count) { column in
Circle()
.foregroundColor(self.gameManager.lights[row][column].status ? .yellow : .gray)
.opacity(self.gameManager.lights[row][column].status ? 0.8 : 0.5)
.frame(width: UIScreen.main.bounds.width / 5,
height: UIScreen.main.bounds.width / 5)
.shadow(color: .yellow, radius: self.gameManager.lights[row][column].status ? 10 : 0)
.onTapGesture {
self.gameManager.updateLightStatus(column: column, row: row)
}
}
}
.padding(EdgeInsets(top: 0, leading: 0, bottom: 20, trailing: 0))
}
}
}
|
运行工程!发现居然点不动了!!!给第 17 行代码加上断点,你会发现实际上是执行了这个方法的。回顾上篇文章中我们所阐述的内容,这是因为 lights 变量的修改未触发 SwiftUI 的 diff 算法去检测需要改变的内容导致的,而之所以 lights 变量未被同步修改是因为Light 模型是值类型,值类型的变量在不同对象间传递时,这个变量会遵循值语义而发生复制,也就是说 GameManager 和 ContentView 里的 lights 是两个完全不一样的变量。而以往我们传递模型时,模型本身几乎都是引用类型,所以不会出现这种问题。
把我们遗忘的 @State 补上,通过这个加上这个修饰词把 lights 变量与游戏布局绑定起来:
1
2
3
4
5
6
7
8
9
| class GameManager {
@State var lights = [
[Light(), Light(status: true), Light()],
[Light(), Light(), Light()],
[Light(), Light(), Light()],
]
}
|
此时再次运行工程,却发生了一个 crash:
1
| Thread 1: Fatal error: Accessing State<Array<Array<Light>>> outside View.body
|
再研究一下我们刚才写的代码,总的来说,我们违反了 SwiftUI 单一数据源的规范,导致 SwiftUI 在执行 DSL 解析时,跑的数据源是非自己所有的。因此,我们要把 lights 这个数据源「转移」给 ContentView。在解决这个问题之前,我们还需要明确一点,GameManager 是用来解决 ContentView 中逻辑太多导致代码臃肿的「中间层」,换句话说,我们要把在 ContentView 中执行的操作都要通过这个「中间层」去解决,因此我们需要用上 Combine 中的 ObservableObject 协议来协助完成单一数据源的规范,修改后的 GameManager 代码如下所示:
1
2
3
4
5
6
7
8
9
| class Manager: ObservableObject {
@Published var lights = [
[Light(), Light(status: true), Light()],
[Light(), Light(), Light()],
[Light(), Light(), Light()],
]
}
|
修改后的 ContentView 代码如下所示:
1
2
3
4
5
| struct ContentView: View {
@ObservedObject var gameManager = Manager()
}
|
此时运行工程,问题解决啦!接下来我们来看看如何配置关卡。我们需要再明确一点,关卡是游戏开局时就已经要确定的,所以我们要在游戏布局渲染之前就要确定此次游戏开局的关卡,也就是要对 GameManager 的初始化方法搞事情。
在 GameManager 中实现一个便捷构造方法,使得我们可以在 ContentView 的初始化方法中重新对 gameManager 变量进行初始化,丢进一些我们真正需要对此次游戏开局时的初始化参数。
1
2
3
4
5
6
7
8
9
10
11
12
13
14
15
16
17
18
19
20
21
22
23
24
25
26
27
28
29
30
31
32
33
34
| class GameManager: ObservableObject {
@Published var lights = [[Light]]()
private(set) var size: Int?
init() {}
convenience init(size: Int = 5,
lightSequence: [Int] = [Int]()) {
self.init()
var size = size
if size > 8 {
size = 7
}
if size < 2 {
size = 2
}
self.size = size
lights = Array(repeating: Array(repeating: Light(), count: size), count: size)
updateLightStatus(lightSequence)
}
}
|
通过 size 参数控制了游戏布局尺寸,并考虑了一些 UI 上的规整。新增了一个 updateLightStatus(_ lightSequence: [Int]) 方法,通过这个方法去做游戏的「随机过程」。
1
2
3
4
5
6
7
8
9
10
11
12
13
14
15
16
17
18
19
20
21
|
private func updateLightStatus(_ lightSequence: [Int]) {
guard let size = size else { return }
for lightIndex in lightSequence {
var row = lightIndex / size
let column = lightIndex % size
if column > 0 && row >= 0 {
row += 1
}
updateLightStatus(column: column - 1, row: row - 1)
}
}
|
因为在 GameManager 的便捷构造方法中传入的 lightSequence 是一个 Int 类型的数组,而且这个数组里元素的实际作用是标记出「亮灯」的顺序,所以我们不能使用 Swift 中一些函数式的做法去加快「点亮」速度,只能使用原始方法去做了。我们在 ContentView 中的代码就变成了:
1
2
3
4
5
6
7
8
9
10
11
12
13
14
15
16
17
18
19
20
21
22
23
24
25
26
27
28
| import SwiftUI
struct ContentView: View {
@ObservedObject var gameManager = GameManager()
init() {
gameManager = GameManager(size: 5, lightSequence: [1, 2, 3])
}
var body: some View {
ForEach(0..<gameManager.lights.count) { row in
HStack(spacing: 20) {
ForEach(0..<self.gameManager.lights[row].count) { column in
Circle()
.foregroundColor(self.gameManager.lights[row][column].status ? .yellow : .gray)
.opacity(self.gameManager.lights[row][column].status ? 0.8 : 0.5)
.frame(width: self.gameManager.circleWidth(),
height: self.gameManager.circleWidth())
.shadow(color: .yellow, radius: self.gameManager.lights[row][column].status ? 10 : 0)
.onTapGesture {
self.gameManager.updateLightStatus(column: column, row: row)
}
}
}
.padding(EdgeInsets(top: 0, leading: 0, bottom: 20, trailing: 0))
}
}
}
|
此时运行工程,会发现我们已经配置好了关卡啦~

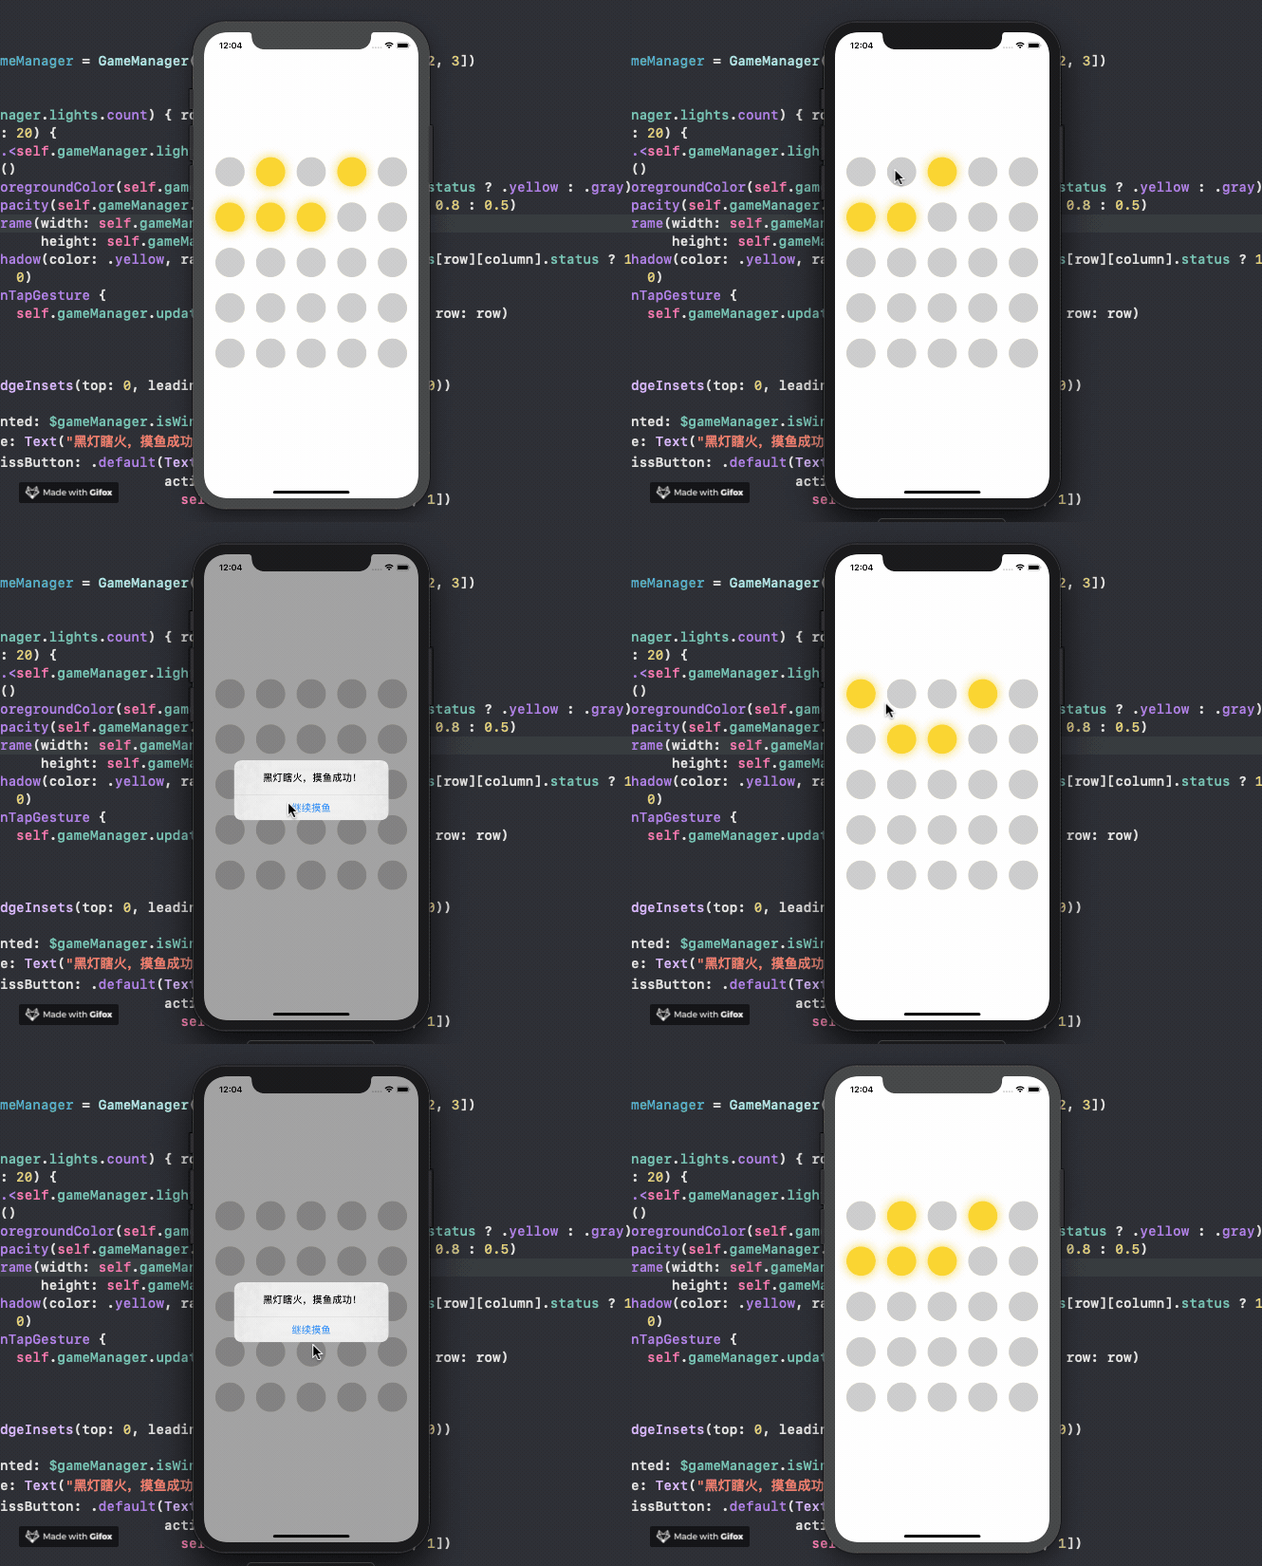
判赢判输
这个游戏判赢和判输都非常简单,如果把灯全都熄灭了就赢得比赛。如果灯全亮了就是输了。那么我们可以用一个 lightingCount 变量去记录下当前游戏中灯亮的盏数,新增一个方法 updateGameStatus:
1
2
3
4
5
6
7
8
9
10
11
12
13
14
15
16
17
18
19
20
21
22
23
24
25
26
27
|
private func updateGameStatus() {
guard let size = size else { return }
var lightingCount = 0
for lightArr in lights {
for light in lightArr {
if light.status { lightingCount += 1 }
}
}
if lightingCount == size * size {
currentStatus = .lose
return
}
if lightingCount == 0 {
currentStatus = .win
return
}
}
|
在此,为了连接 SwiftUI 使用 currentStatus 变量记录了当前游戏的状态,经过我们之前的游戏经验,《能否关个灯》游戏的整体状态就三个:
因此我们可以创建一个枚举去记录下当前的游戏状态:
1
2
3
4
5
6
7
8
9
10
| extension GameManager {
enum GameStatus {
case win
case lose
case during
}
}
|
并把 GameManager 做如下修改:
1
2
3
4
5
6
7
8
9
10
11
12
13
14
15
16
17
| class GameManager: ObservableObject {
@Published var lights = [[Light]]()
@Published var isWin = false
private var currentStatus: GameStatus = .during {
didSet {
switch currentStatus {
case .win: isWin = true
case .lose: isWin = false
case .during: break
}
}
}
}
|
我们又新增了一个 @Published 修饰的变量 isWin,用于游戏状被修改时通知 SwiftUI 做视图的更新。
重新开始
接下来我们要考虑,当玩家赢得游戏时游戏要重新开始。重新开始游戏本质上只是对 lights 数据源的状态更新,因为此时游戏布局已经生成好,不需要重新渲染。对 GameManager 增加一个新方法:
1
2
3
4
5
6
7
8
9
10
11
12
13
14
15
16
17
18
19
20
21
22
23
24
25
26
27
28
29
30
31
32
33
34
35
36
|
convenience init(size: Int = 5,
lightSequence: [Int] = [Int]()) {
self.init()
var size = size
if size > 8 {
size = 7
}
if size < 2 {
size = 2
}
self.size = size
lights = Array(repeating: Array(repeating: Light(), count: size), count: size)
start(lightSequence)
}
func start(_ lightSequence: [Int]) {
currentStatus = .during
updateLightStatus(lightSequence)
}
|
对 ContentView 做如下修改:
1
2
3
4
5
6
7
8
9
10
11
12
13
14
15
16
17
18
19
20
21
22
23
24
25
26
27
28
29
30
31
32
33
| import SwiftUI
struct ContentView: View {
@ObservedObject var gameManager = GameManager(size: 5, lightSequence: [1, 2, 3])
var body: some View {
ForEach(0..<gameManager.lights.count) { row in
HStack(spacing: 20) {
ForEach(0..<self.gameManager.lights[row].count) { column in
Circle()
.foregroundColor(self.gameManager.lights[row][column].status ? .yellow : .gray)
.opacity(self.gameManager.lights[row][column].status ? 0.8 : 0.5)
.frame(width: self.gameManager.circleWidth(),
height: self.gameManager.circleWidth())
.shadow(color: .yellow, radius: self.gameManager.lights[row][column].status ? 10 : 0)
.onTapGesture {
self.gameManager.updateLightStatus(column: column, row: row)
}
}
}
.padding(EdgeInsets(top: 0, leading: 0, bottom: 20, trailing: 0))
}
.alert(isPresented: $gameManager.isWin) {
Alert(title: Text("黑灯瞎火,摸鱼成功!"),
dismissButton: .default(Text("继续摸鱼"),
action: {
self.gameManager.start([3, 2, 1])
}
)
)
}
}
}
|
告知用户赢得比赛,我的做法是在游戏界面中弹出一个 alert,并通过 GameManager 中的 isWin 变量来控制 alert 出现和隐藏,当 alert 出现时,用户点击 alert 中的「继续摸鱼」即可开始下一局比赛。运行工程,又可以愉快的玩耍啦!

后记
在这篇文章中,我们对游戏逻辑做了进一步的完善,可以说通过不断的抽象,把游戏逻辑和界面进行了分离。通过这种做法可以让后续实现的需求鲁棒性更强!
现在,我们的需求已经完成了:
赶快把工程跑起来,配置一个属于你自己的关卡,拉上小伙伴来体验一番吧~
GitHub 地址:https://github.com/windstormeye/SwiftGame


