在上篇文章中,已经大致的描述出为什么要接触 Flutter 以及对 Flutter 初体验的一些总结,整体上 Flutter 给我的第一印象是不太好的,但这次不一样了!这篇文章主要描述了我在使用 Flutter 实现的豆瓣电影 Top250 demo 过程,让我领略到了 Flutter 在 UI 层面的魅力!
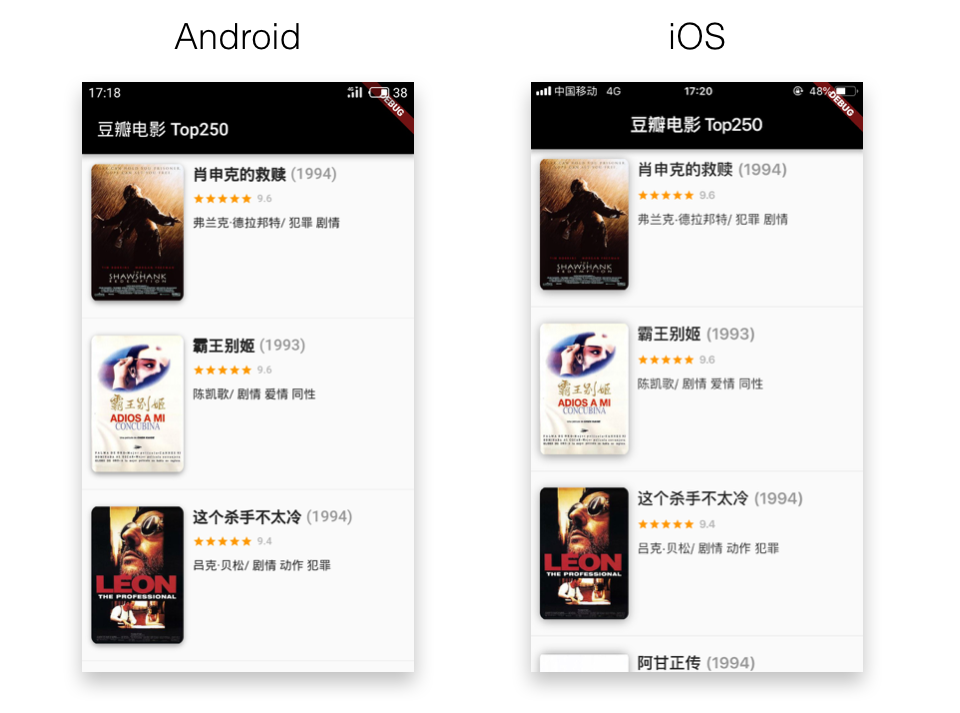
前言 目前只完成了 demo 的 UI 部分 ,主要体验了 Flutter 在基本 UI 层面上友好度。从整体来看,在一些细节的地方确实没有原生(iOS & Android)有太大的优势,在某些 UI 上的实现还比较麻烦。如果仅仅从跨端开发这一点上看,优势就相当明显了,如上篇文章 中所说,Flutter 在 SDK 层面直接替换掉了整个与原生相关的框架,采用了 Skia 替换,在跨端上能够很好的保证 UI 最终渲染出来的结果统一。 demo 如下:
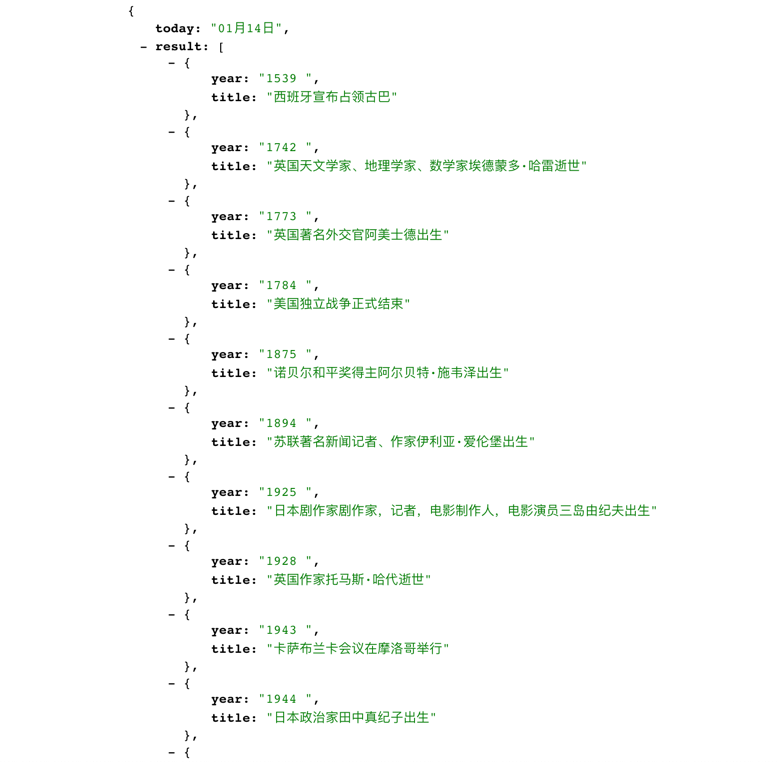
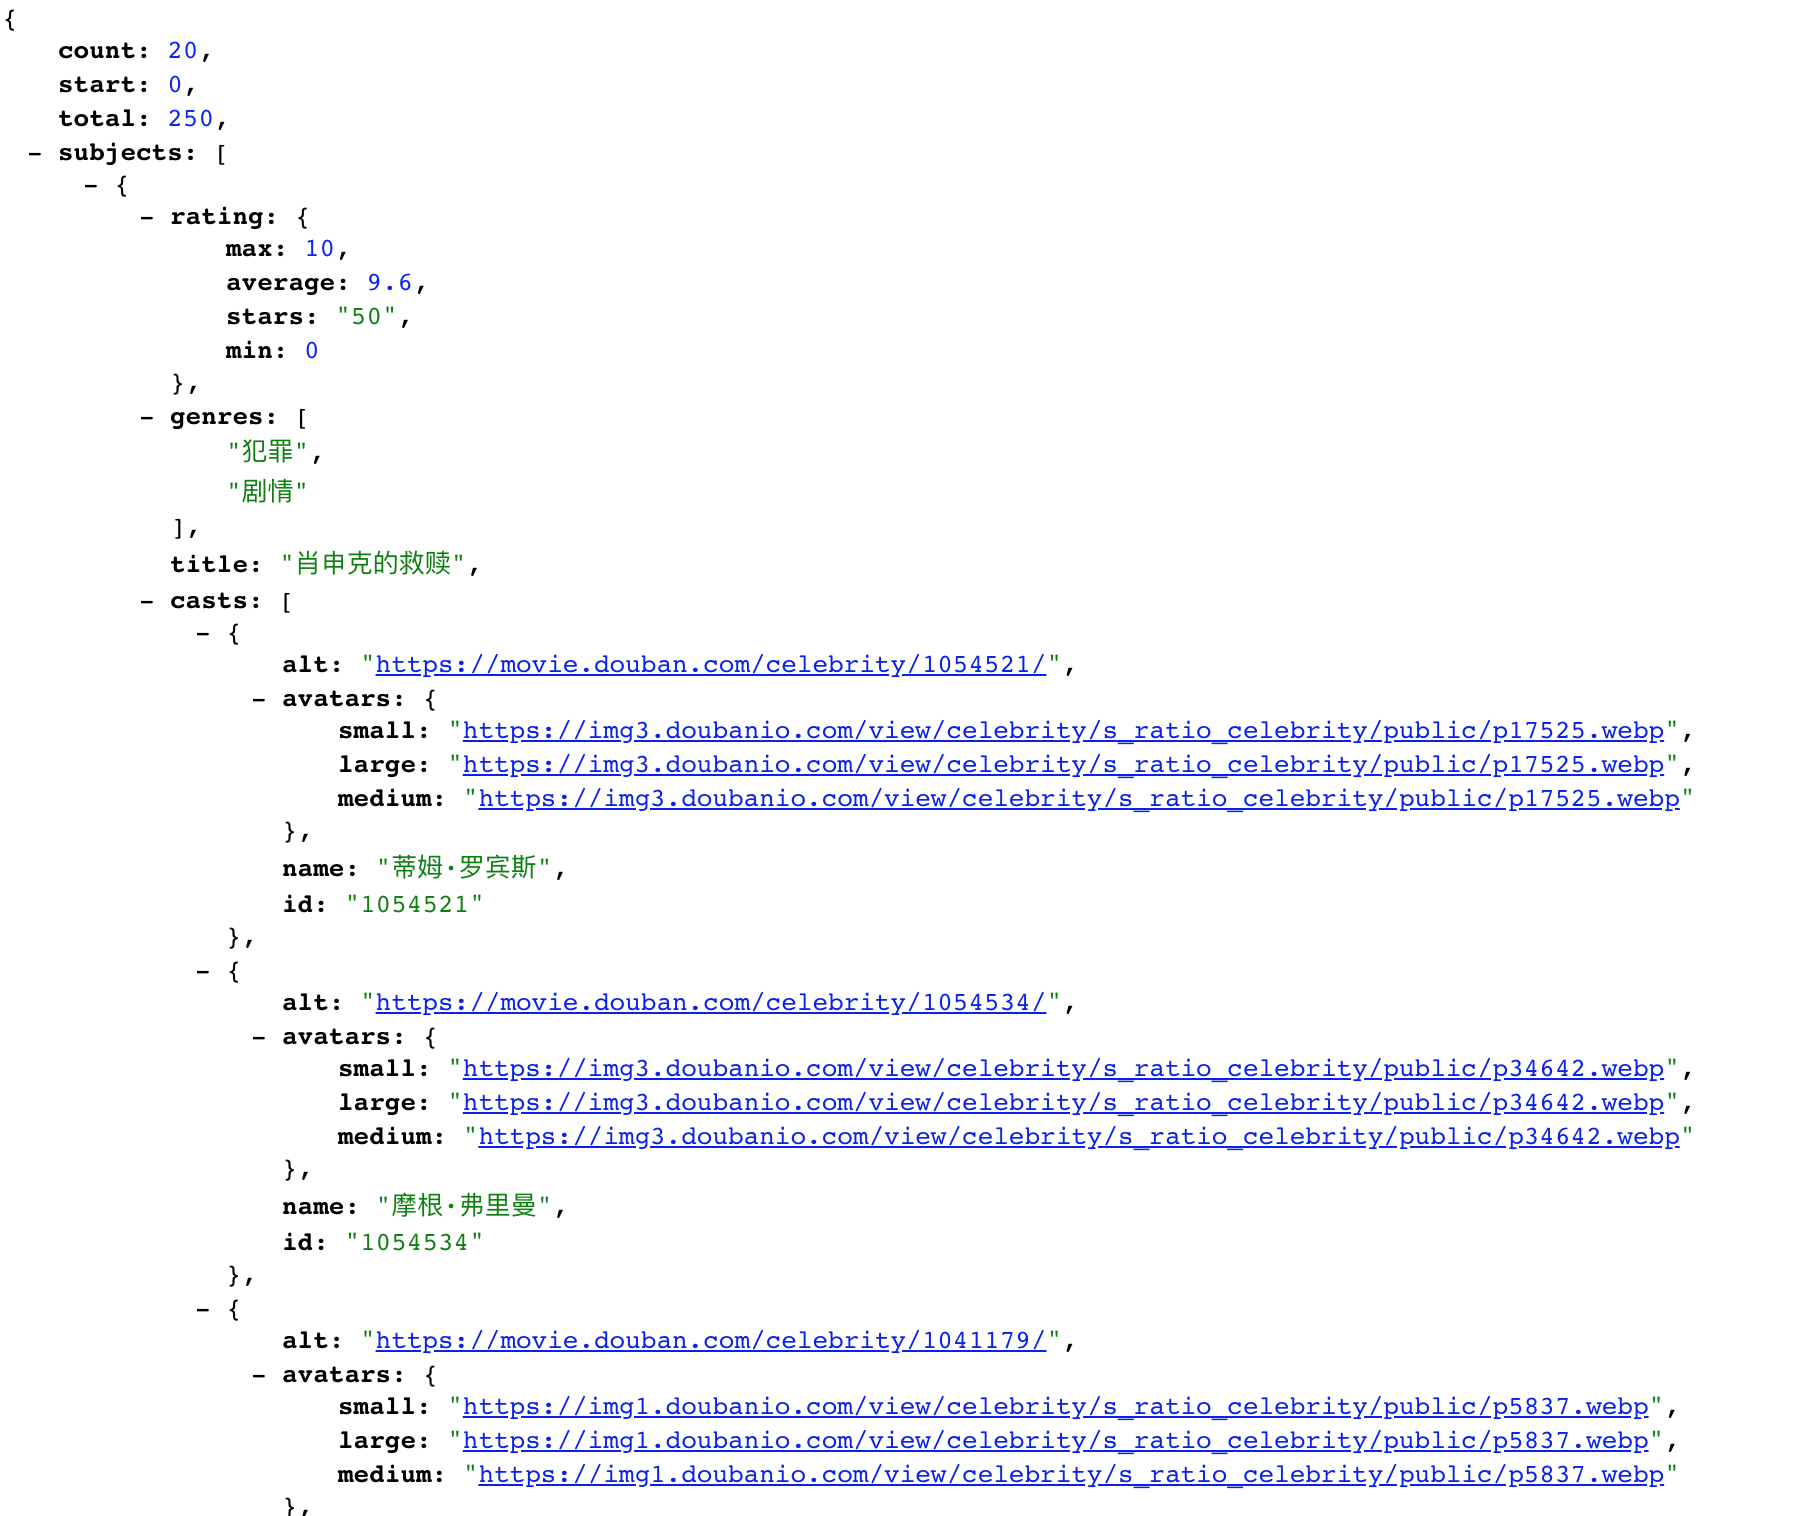
数据来源 原本想直接使用公司 API 进行测试,这样能够快速验证在接触到实际数据的过程中,Flutter 在 UI 层面上和原生的优劣,但因保密等原因,只能另寻它路。最终从历史上的今天 和豆瓣电影 Top250 两个 API 中选择了后者,原本只是想验证在长列表的展示上的优劣,但后来又考虑到了豆瓣电影 Top250 的 API 所提供的资源较丰富、数据格式也够复杂,算是比较贴合生产环境。
涉及 Flutter 知识点
HTTP;
JSON 数据格式解析和模型转换;
Row 、 Column 、 Padding 、 布局;ListView、Text 等基本 Widget 使用;Container 设置图片圆角、阴影等属性设置。
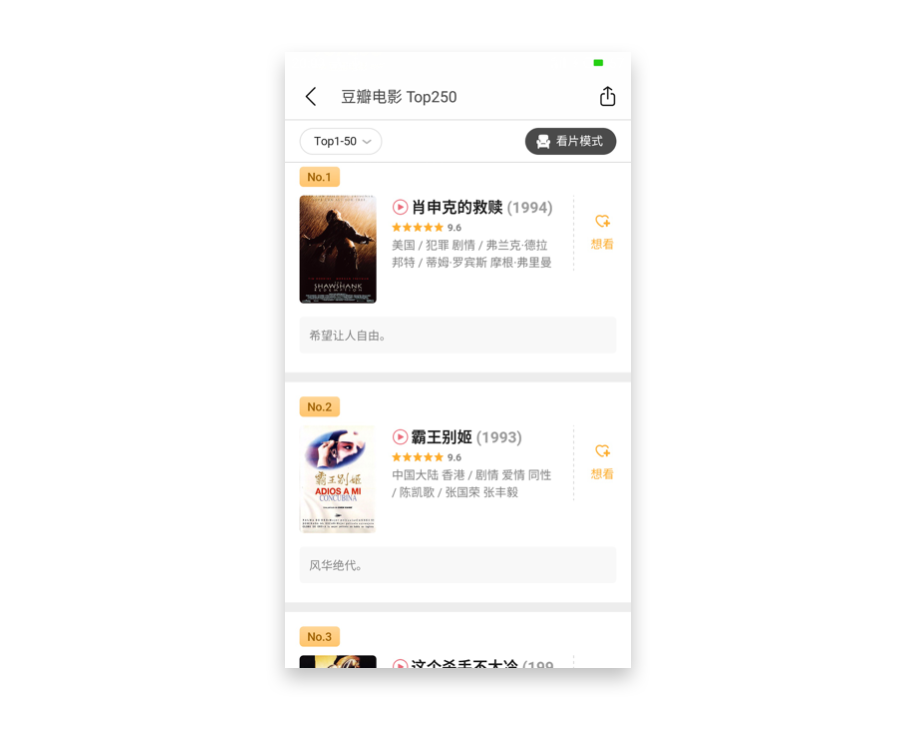
实践 有了数据源,就可以准备上手搭建 UI 了。因为是豆瓣电影 Top250 的数据源,就直接 copy 了官方 App 的设计,同时也为了保证后续做性能验证时各种跨端和原生技术互相对比时遵循“单一变量”原则,但中途还是因为数据源的关系,有些数据并未暴露出来,导致没法 100% 的 copy 。
数据处理 Flutter 中进行 RESTful web API 请求是一件比较流畅的事情。在 flutter 中使用 http 拉取豆瓣电影 Top250 的数据,我是这么做的:
1
2
3
4
5
6
7
8
9
10
11
12
13
14
15
import 'dart:io' ;import 'dart:convert' ;import 'package:movie_top_250/movieModel.dart' ;class MovieAPI Future<MovieEnvelope> getMovieList(int start) async { var client = HttpClient(); var request = await client.getUrl(Uri .parse( 'https://api.douban.com/v2/movie/top250?start=$start &count=100' )); var response = await request.close(); var responseBody = await response.transform(utf8.decoder).join(); Map data = json.decode(responseBody); return MovieEnvelope.fromJSON(data); } }
对 API 数据请求方法做了简单的封装,并返回 Future 类型数据。flutter 中进行异步操作,返回的都是“懒加载”数据,上文我们也说到,豆瓣电影 Top250 API 返回的数据格式较复杂,直接使用 response 中的数据成本很大,所以在此又封装了两个 Model ,分别为 Movies 和 Movie。
1
2
3
4
5
6
7
8
9
10
11
12
13
14
15
16
17
18
19
20
21
22
23
24
25
26
27
28
29
30
31
32
33
34
35
36
37
38
39
40
41
42
43
44
45
46
47
48
49
50
51
52
53
54
55
class Movie String id; String rating; String stars; String title; String director; String year; String poster; List <String > genres; Movie({ this .id, this .rating, this .title, this .director, this .year, this .stars, this .poster, this .genres }); Movie.fromJSON(Map <String , dynamic > json) { this .id = json['id' ]; this .rating = json['rating' ]['average' ].toString(); this .stars = json['rating' ]['stars' ]; this .title = json['title' ]; this .director = json['directors' ][0 ]['name' ]; this .year = json['year' ]; this .poster = json['images' ]['small' ]; this .genres = new List <String >.from(json['genres' ]); } } class Movies int count; int start; int total; List <Movie> movies; Movies({this .count, this .start, this .total, this .movies}); Movies.fromJSON(Map data) { this .count = data['count' ]; this .start = data['start' ]; this .total = data['total' ]; List <Movie> movies = []; (data['subjects' ] as List ).forEach((item) { Movie movie = Movie.fromJSON(item); movies.add(movie); }); this .movies = movies; } }
UI UI 部分在上篇文章中快速入门了一下,但比较 Dart 对于我来说是一门全新的语言,光是在“数据处理”环节中就耗费了一部分精力(虽然最后的代码较精简),原本打算就将就的写写就完事了,但睡了一觉醒来后,告诉自己并不能放弃!继续开始对豆瓣电影 Top250 App 页面的布局进行分析。
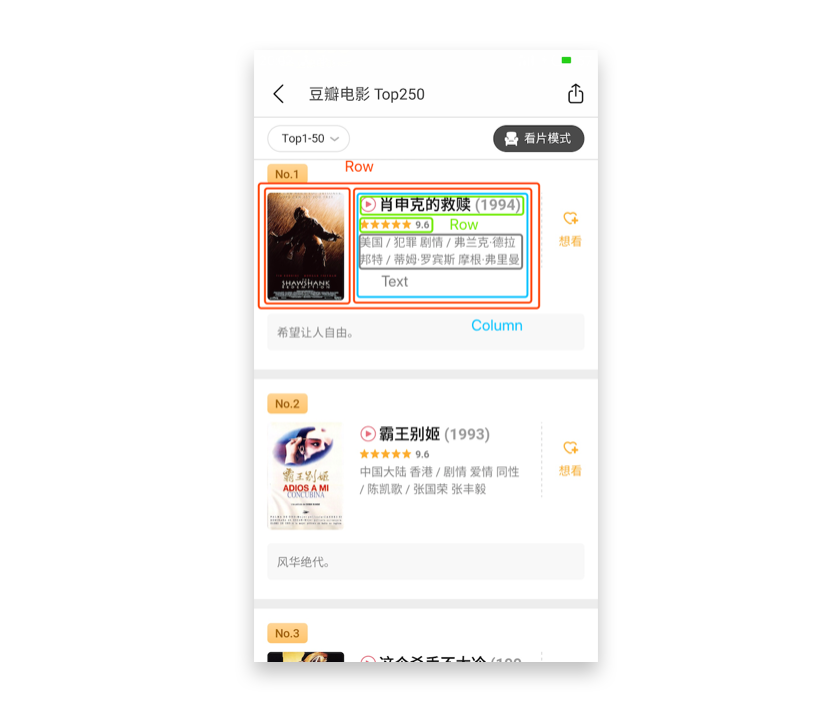
因为本来就没打算把这个 demo 做得多么完美,只想尽可能的做到贴近 app 的展示,所以没有采用其它更适合的布局 Widget,经过分析后发现只用简单的 Row 和 Column 布局几乎可以完成大部分工作。
主体 1 2 3 4 5 6 7 8 9 10 11 12 13 14 15 16 17 18 19 20 21 22 23 24 25 26 27 28 import 'package:flutter/material.dart' ;import 'package:movie_top_250/movieApi.dart' ;import 'package:movie_top_250/movieModel.dart' ;void main() => runApp(MyApp(movies: MovieAPI().getMovieList(0 )));class MyApp extends StatelessWidget final Future<Movies> movies; var page = 0 ; MyApp({Key key, this .movies}) : super (key: key); @override Widget build(BuildContext context) { return MaterialApp( title: '豆瓣电影 Top250' , theme: ThemeData( primaryColor: Colors.black, ), home: Scaffold( appBar: AppBar( title: Text('豆瓣电影 Top250' ), ), body: _buildList(), ), ); } }
排除掉其它 Widget 组件后,整个 demo 的骨架如上图所示,整体来看还算清晰,而且与 HTML 的骨架也基本类似,可以说 Dart 当初的为了替换 JS 目的的影子还是十分明显的。
在 _buildList() 方法中主要利用了 ListView Widget 进行搭建。令我感到意外的是,ListView Widget 居然没有属性进行设置分割线!当然,在 Weex 和 React-Native 中同样也是没有的,这两个框架本质上就是写的 HTML ,接着我又想到 Dart 不也是要替换前端三剑客霸主的么?这么一想就没啥问题了。
1 2 3 4 5 6 7 8 9 10 11 12 13 14 15 16 17 18 19 20 21 22 23 24 25 26 27 28 29 30 31 32 Widget _buildList() { return FutureBuilder<Movies>( future: movies, builder: (context, snapshot) { if (snapshot.hasData) { return ListView.builder( itemCount: snapshot.data.movies.length * 2 , itemBuilder: (context, index) { if (snapshot.data.movies.length - index < 10 ) { MovieAPI().getMovieList(++page); } if (index.isOdd) { return new Divider(); } else { index = index ~/ 2 ; return _buildListRow(snapshot.data.movies[index]); } }); } else if (snapshot.hasError) { return Text("${snapshot.error} " ); } return new Center( child: new CircularProgressIndicator( backgroundColor: Colors.black ) ); }, ); }
分割线的设置利用了 Divider Widget 进行设置,而且还不能直接添加到单一 item 的渲染节点树中,必须重新起一个 item ,单独占据 ListView 的一个索引。上文这段代码的核心来自官方 demo,但写完后,个人觉得这么做有点不妥,总是担心后续在使用 ListView 树节点进行某些“特殊”操作时引发一些问题。
需要注意的地方是 ListView 渲染的 cell 条数会因为分割线的加入而减少一半,所以我们要对 itemCount 属性值变为模型列表的两倍长,以此来恢复正确需要渲染的 cell 数据。
ListViewRowPoster Widget _buildListRow(movie) 方法主要是用来搭建 cell widget 而进行的简单封装。不得不说在编写该 widget 时,整体给我一种以为是在写 CSS 布局的错觉,这点给有一些 web 基础的同学上手会十分快!
1 2 3 4 5 6 7 8 9 10 11 12 13 14 15 16 17 18 19 20 21 22 23 24 25 26 27 28 Widget _buildListRow(Movie movie) { return Padding( padding: EdgeInsets.all(10 ), child: new Row( mainAxisAlignment: MainAxisAlignment.start, crossAxisAlignment: CrossAxisAlignment.start, children: <Widget>[ new Container( width: 100 , height: 150 , decoration: new BoxDecoration( image: DecorationImage(image: NetworkImage(movie.poster)), boxShadow: <BoxShadow>[ new BoxShadow( color: Colors.grey, offset: new Offset(0.0 , 2.0 ), blurRadius: 4.0 , ) ], borderRadius: new BorderRadius.all( const Radius.circular(8.0 ), ), ), ), _buildTextContent(movie), ]), ); }
刚开始使用 Image widget 进行图片的加载,非常顺畅的就把图片资源加载出来了,等到后边开始统一美化数据时被“圆角”和“阴影”坑惨了,本以为给 Image widget 添加这两个属性是非常容易的事情,就像在 iOS 中给 UIImageView 或者 UIView 那般简单粗暴,但后来磕磕碰碰的查阅资料写出了“圆角”和“阴影”效果后才恍然大悟!
在 iOS 中之所以能够简单粗暴快速的给 UIView 和 UIImageView 添加上“圆角”和“阴影”属性,是因为二者都父类之一是 UIView,UIView 实现了 CALayerDelegate 协议,所谓的“圆角”和“阴影”都是 CALayer 的属性,所以设置的时候通常都是这么写:
1 2 yourIamgeView.layer.cornerRadius = 8 yourIamgeView.layer.shadowColor = .black
但是在 flutter 中的 Image widget 只是继承自 StatefulWidget ,而 StatefulWidget 是继承自 Widget ,并不具备绘图能力,所以为什么没有“圆角”和“阴影”属性也就水落石出了。最后的做法是通过利用 Container widget 的 decoration 属性来添加相关修饰。
ListViewRowTextContent Widget ListViewRow Widget 的左侧部分已经完成了,接下来就到了稍微复杂的右侧部分。在文章开头部分,我们已经看到了相关相关的设计图,主要是个整体纵向布局和几块小部分的横向布局。
1 2 3 4 5 6 7 8 9 10 11 12 13 14 15 16 17 18 19 20 21 22 23 24 25 26 27 28 29 30 31 32 33 34 35 36 37 38 39 40 41 42 43 44 45 46 47 48 49 50 51 52 53 54 55 56 57 58 59 60 61 62 63 64 65 66 67 68 69 70 71 72 73 74 75 76 77 78 79 80 81 82 83 84 85 86 87 Widget _buildTextContent(Movie movie) { return new Padding( padding: EdgeInsets.fromLTRB(10 , 0 , 0 , 0 ), child: new Column( crossAxisAlignment: CrossAxisAlignment.start, children: <Widget>[ _buildTitle(movie), _buildRatingStar(movie), _buildDetails(movie), ], ), ); } Widget _buildTitle(Movie movie) { return new Row( children: <Widget>[ new Text( movie.title, style: new TextStyle( fontSize: 18 , fontWeight: FontWeight.w600, ), ), new Text( ' (' + movie.year + ')' , style: new TextStyle( color: Color.fromRGBO(150 , 150 , 150 , 1 ), fontWeight: FontWeight.w600, fontSize: 18 , ), ) ], ); } Widget _buildRatingStar(Movie movie) { List <Widget> icons = []; int fS = int .parse(movie.stars) ~/ 10 ; int f = 0 ; while (f < fS) { icons.add(new Icon(Icons.star, color: Colors.orange, size: 13 )); f++; } while (icons.length != 5 ) { icons.add(new Icon(Icons.star, color: Color.fromRGBO(220 , 220 , 220 , 1 ), size: 13 )); } icons.add(new Padding( padding: EdgeInsets.fromLTRB(5 , 0 , 0 , 0 ), child: new Text( movie.rating, style: new TextStyle( fontSize: 12 , fontWeight: FontWeight.w600, color: Color.fromRGBO(180 , 180 , 180 , 1 ), ), ), )); return new Padding( padding: EdgeInsets.fromLTRB(0 , 10 , 0 , 10 ), child: new Row(children: icons), ); } Widget _buildDetails(Movie movie) { var detailsString = '' ; detailsString = movie.director; detailsString += '/' ; for (String name in movie.genres) { detailsString += ' ' + name; } return new Container( width: 230.0 , child: new Text(detailsString, softWrap: true , ) ); }
在这部分中,稍微费劲点的地方是 _buildRatingStar() 方法所构造的“评分组件”,在豆瓣 App 中浏览了好一会儿“评分组件”的星星是怎么个显示规则,琢磨了一会儿得出了一个结论:
**9.2+**:五星;
**8.1~9.1+**:四星半;
正准备拍手叫好接入数据时,突然发现了一个令人尴尬的事情,
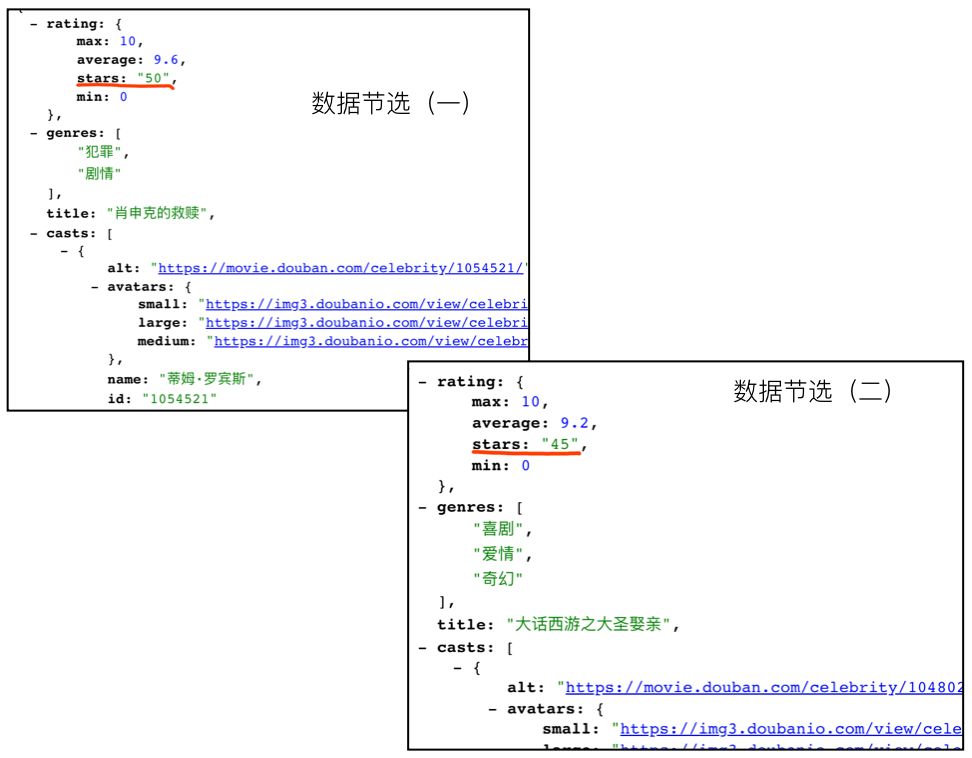
其实 API 中已经给出了具体的评分,根本不需要我们自己去算!当时还奇怪怎么翻了前面几条数据的 star 字段数据都是 "50",实际上是五星的意思……经过这样一番折腾后,后续的重点就转移到了星星的显示上,好在 flutter 提供了 star 这个 icon,但是却没有半个星星的 icon。权衡了一下决定就先这样吧,没有半星就没有了。
总结 因为时间和内容消化等因素,豆瓣电影 Top250 demo 将在下篇文章中完成:
下拉刷新;
上拉加载;
跳转页面,查看影片详情;
性能测试。
经过本次对 Flutter 在 UI 层面上的学习,对 flutter 的认识又更深了一步,反驳掉了自己在上篇文章中说 flutter 要凉的一部分。
