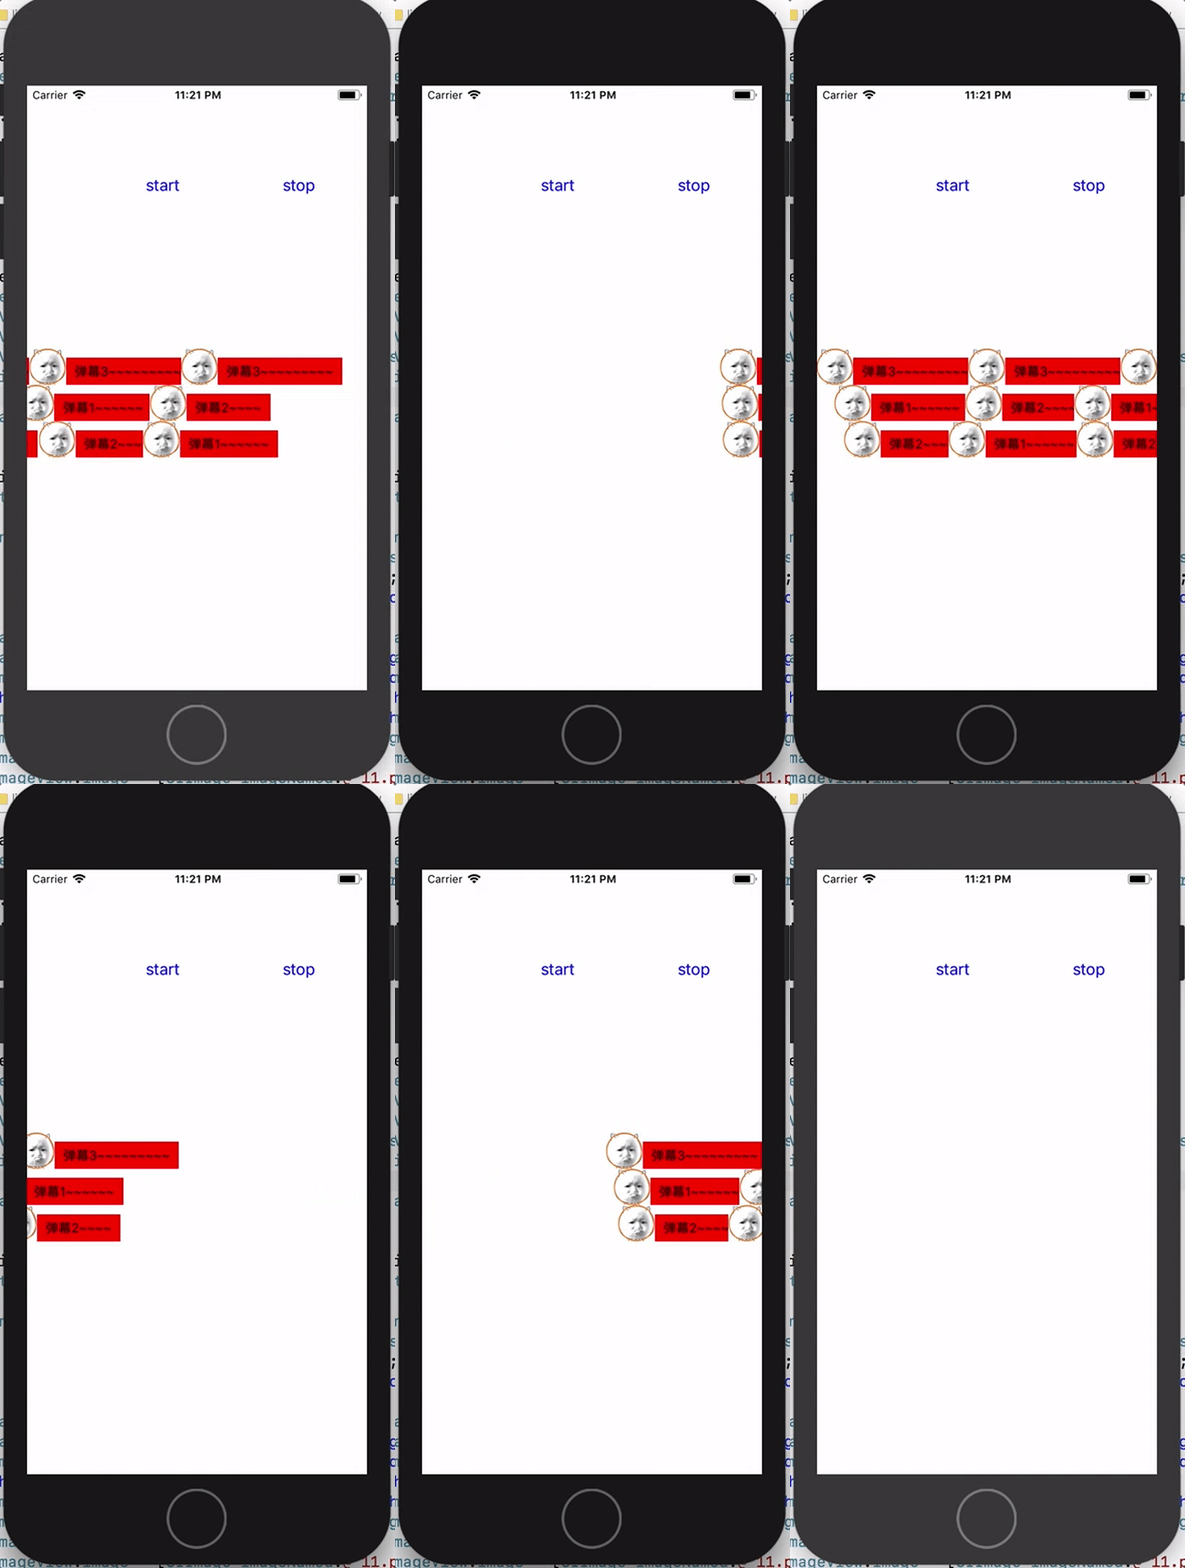
这是iOS开发More系列的弹幕练习总结。关于弹幕的实现在GitHub上已经有一堆的实现了,国内外都有大量的第三方库,并且做的都不错,但是给我的感觉弹幕的简单实现并不需要多少精力,遂有了这次练习。
先来看整体实现(可能有些丑😓),

此次的弹幕实现只是个练习,很多地方都做得不够完善,比如并未加入实时视频流,所以实际上实现的甚至连demo都不是,只能勉强说是造了个型,只抓住了最核心的部分而已。
1
2
3
4
5
6
7
8
9
10
11
| .
├── 11.png # 头像
├── AppDelegate.h
├── AppDelegate.m
├── BulletManage.h # 弹幕管理类
├── BulletManage.m
├── BulletView.h # 弹幕View
├── BulletView.m
├── ViewController.h
├── ViewController.m
└── main.m
|
实现弹幕练习的主要文件目录结构如上所示,可以看到实际上核心类只有BulletManager和BulletView而已,BulletManager负责管理弹幕整体的开始和结束,比如弹幕数据源的获取、弹幕View的初始化、根据弹幕的Start,Enter,End三个状态分别管理对应状态弹幕等,而BulletView则负责管理每个弹幕本身,包括动画时长、何时进入、位于哪个弹道、自身当前状态等。虽然只是个弹幕练习,但是我猜测应该不是使用原生的视频播放器类,要么继承要么重写,否则弹幕整体的View层级和原生视频播放器类是会冲突的,导致弹幕上不去。
弹幕练习涉及到的UI部分功能编写较多,所以总结中不会涉及到从零开始进行讲解,而是重点放在核心代码部分,具体细节可在文末项目地址load工程进行查看。
1
2
3
4
5
6
7
8
9
10
11
12
13
14
15
16
17
18
19
20
21
22
23
24
25
26
27
28
29
30
31
32
33
34
35
36
37
38
39
40
41
42
| - (void)startAnimation {
CGFloat screenWidth = [UIScreen mainScreen].bounds.size.width;
CGFloat duration = 4.0f;
CGFloat wholeWidth = screenWidth + CGRectGetWidth(self.bounds);
if (self.moveStatusBlock) {
self.moveStatusBlock(Start);
}
CGFloat speed = wholeWidth / duration;
CGFloat enterDuration = CGRectGetWidth(self.bounds) / speed;
[self performSelector:@selector(enterScreen) withObject:nil afterDelay:enterDuration];
__block CGRect frame = self.frame;
[UIView animateWithDuration:duration delay:0 options:UIViewAnimationOptionCurveLinear animations:^{
frame.origin.x -= wholeWidth;
self.frame = frame;
} completion:^(BOOL finished) {
[self removeFromSuperview];
if (self.moveStatusBlock) {
self.moveStatusBlock(End);
}
}];
}
- (void)enterScreen {
if (self.moveStatusBlock) {
self.moveStatusBlock(Enter);
}
}
- (void)stopAnimation {
[NSObject cancelPreviousPerformRequestsWithTarget:self];
[self.layer removeAllAnimations];
[self removeFromSuperview];
}
|
以上是BulletView的开始动画方法实现,我们默认每一条弹幕都是从手机屏幕最右边移动到屏幕最左边,移动时间定义为4秒,执行该方法时需要给一个值回调,告诉外部初始化弹幕的类,该条弹幕现在的状态为Start,当弹幕从屏幕最右边即将出现的那一瞬间我们需要把弹幕的状态改为Enter,Enter状态一直持续到弹幕移动到手机屏幕最左边即将消失的那一瞬间。
保持Enter状态的距离注意应该是由当前手机屏幕的宽度+弹幕的实时长度而不只是屏幕的自身宽度而已,关于计算弹幕的实时长度在此推荐使用NSString的sizeWithAttributes方法。并且,刚开始我使用的是GCD的after方法去做enterDuration时间过后的弹幕销毁,但实际上使用GCD的after方法会一直在enterDuration后循环执行,会导致空指针异常,推荐使用基于runtime的performSelector延迟方法。
接下里我们来瞅瞅BulletManager弹幕管理类都做了哪些工作。首先是初始化弹幕,默认弹道为三个,
1
2
3
4
5
6
7
8
9
10
11
12
13
14
15
16
| - (void)initBulletComment {
NSMutableArray* trajectorys = [NSMutableArray arrayWithArray:@[@(0), @(1), @(2)]];
for (int i = 0; i < 3; i++) {
if (self.bulletComment.count > 0) {
NSInteger index = arc4random() % trajectorys.count;
int trajectory = [[trajectorys objectAtIndex:index] intValue];
[trajectorys removeObjectAtIndex:index];
NSString* comment = [self.bulletComment firstObject];
[self.bulletComment removeObjectAtIndex:0];
[self createBulletView:comment trajectory:trajectory];
}
}
}
|
在创建弹幕的方法中,每创建一个弹幕我们都会拿到一个block回调moveStatusBlock,其有一个状态参数Status,当status发生变化时,都会进入到该block回调中,从上边的弹幕初始化方法中我们也看到了实际上只创建出了三个弹幕而已,而余下的弹幕我们通过了每个弹幕都持有的block回调进行创建。使用block回调能够较为简约的处理一个实例的各种状态值变化时所引发的二次操作。
1
2
3
4
5
6
7
8
9
10
11
12
13
14
15
16
17
18
19
20
21
22
23
24
25
26
27
28
29
30
31
32
33
34
35
36
37
38
39
40
41
42
43
44
45
46
47
48
49
50
51
52
53
54
55
56
57
58
59
60
61
62
63
64
65
66
67
68
69
70
71
72
73
74
75
76
77
| - (void)createBulletView:(NSString *)comment trajectory:(int)trajectory {
if (self.isStopAnimation) {
return ;
}
BulletView* bulletView = [[BulletView alloc] initWithComment:comment];
bulletView.trajectory = trajectory;
[self.bulletViews addObject:bulletView];
__weak typeof (bulletView) weakBulletView = bulletView;
__weak typeof (self) weakSelf = self;
bulletView.moveStatusBlock = ^(MoveStatus status){
if (self.isStopAnimation) {
return ;
}
switch (status) {
case Start: {
[weakSelf.bulletViews addObject:weakBulletView];
break;
}
case Enter: {
NSString *comment = [weakSelf nextComment];
if (comment) {
[weakSelf createBulletView:comment trajectory:trajectory];
}
break;
}
case End: {
if ([weakSelf.bulletViews containsObject:weakBulletView]) {
[weakBulletView stopAnimation];
[weakSelf.bulletViews removeObject:weakBulletView];
}
if (weakSelf.bulletViews.count == 0) {
self.isStopAnimation = true;
[weakSelf start];
}
break;
}
}
};
if (self.generateViewBlock) {
self.generateViewBlock(bulletView);
}
}
- (NSString *)nextComment {
if (self.bulletComment.count == 0) {
return nil;
}
NSString *comment = [self.bulletComment firstObject];
if (comment) {
[self.bulletComment removeObjectAtIndex:0];
}
return comment;
}
- (void)stop {
if (self.isStopAnimation) {
return ;
}
self.isStopAnimation = true;
[self.bulletViews enumerateObjectsUsingBlock:^(id _Nonnull obj, NSUInteger idx, BOOL * _Nonnull stop) {
BulletView* view = obj;
[view stopAnimation];
view = nil;
}];
[self.bulletViews removeAllObjects];
}
|
在弹幕的stop方法中,使用到了一个枚举器,而枚举器是一种苹果官方推荐的更加面向对象的一种遍历方式,相比于for循环,它具有高度解耦、面向对象、使用方便等优势,当然,你会发现其和for-in有一丢丢思想上的相似,id类型对象obj为遍历枚举到的每一个对象,idx为当前枚举到的所在数组的下标,NSDictionary同样也支持该方法,idx换为了key,BOOL类型stop为跳出枚举循环的标记,赋值为true即可退出。
以上就是本次弹幕练习的总结,只涉及到了核心代码,还有写小的细节没有说到,详细代码见工程😝
